
Make your first booking
A test booking proves everything is set up. If you can book it, your clients can too.
Open the calendar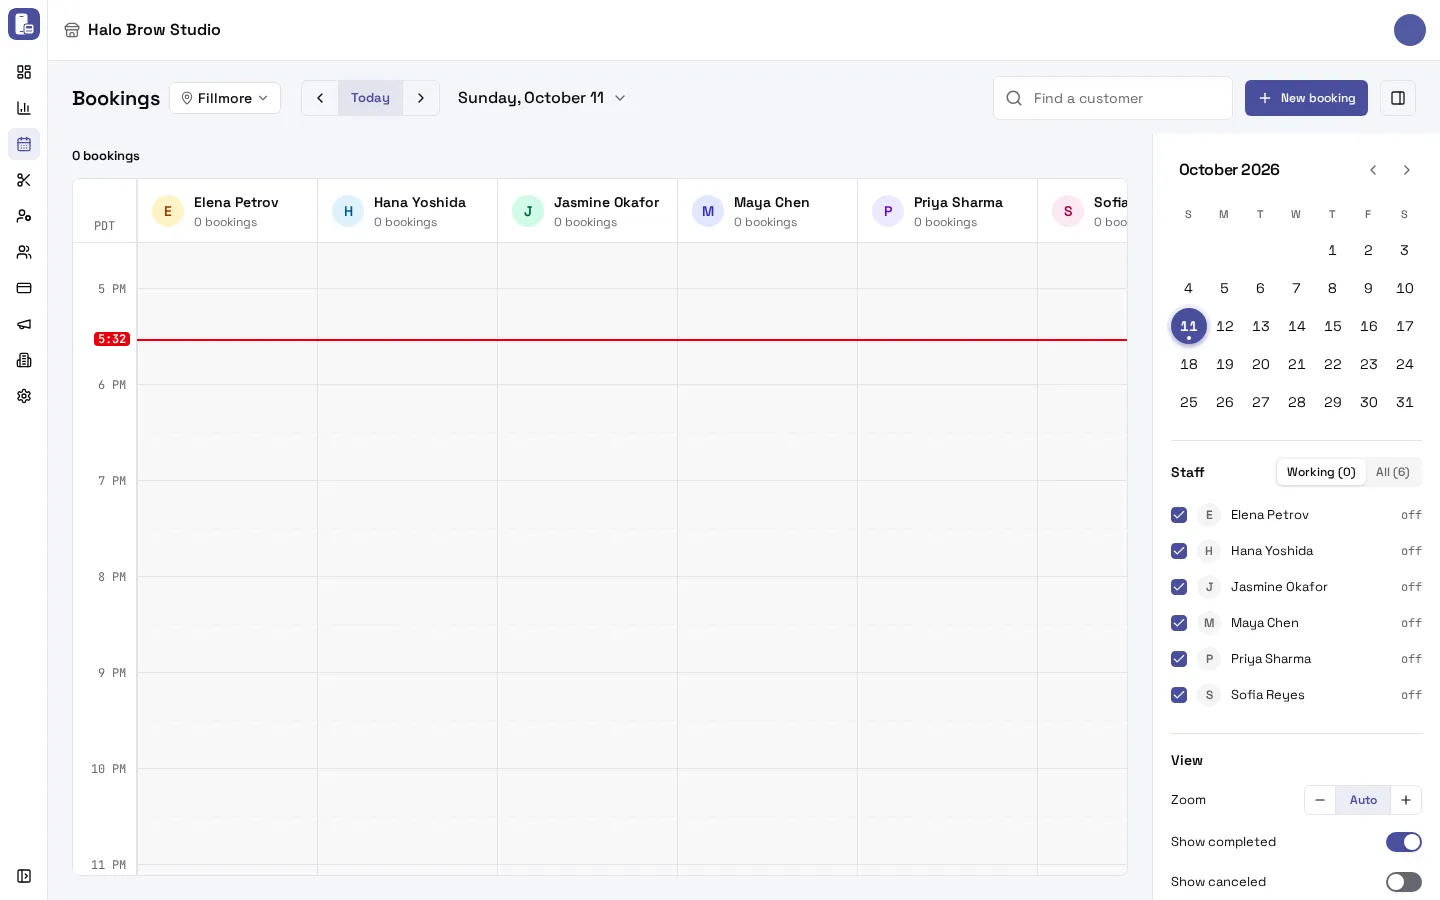
How do I add a booking?
Section titled “How do I add a booking?”-
Go to Appointments > Calendar. The page is called Bookings and shows one column per person working that day.
-
Press New booking. It opens the same booking steps your clients see on your booking site.
Shortcut: click an empty spot in someone’s column. The booking opens with that person, day and time already picked.
-
Choose a service, a staff member and a time, then enter the client’s details. For a test, use your own phone number and tick the box to get appointment texts, so you see the confirmation text arrive.
-
Finish the booking. It appears on the calendar in the person’s column.
Didn’t get a text? Check the Booking confirmation is on in Appointment texts. They’re off until you turn them on.
How do I move or change a booking?
Section titled “How do I move or change a booking?”- Drag a booking to a new time or person. Drag its bottom edge to make it longer or shorter.
- A box asks you to confirm (Move booking or Change length). Leave Notify client about the change ticked to let the client know, or untick it.
- Click a booking to see it, then open it to change services, add notes, check the client in or cancel it.
Completed, cancelled and no-show bookings are locked and can’t be dragged.
More in The booking calendar.
Troubleshooting
Section titled “Troubleshooting”New booking is greyed out
Section titled “New booking is greyed out”Online booking is off. Choose a booking address and press Turn on in Settings > Online booking.
No times show when I book
Section titled “No times show when I book”Check:
- the person has a shift that day,
- they do the service (Services they do),
- the location is open then,
- the day is within Customers can book up to in Online booking.
The booking is on the wrong day or time
Section titled “The booking is on the wrong day or time”Check the location’s time zone in Settings > Details. The calendar and the booking site both use it.
Someone is missing from the calendar
Section titled “Someone is missing from the calendar”The calendar shows the people working that day by default. Open the sidebar (the panel button at the top right) and choose All under Staff to see everyone.
The booking says it needs confirmation
Section titled “The booking says it needs confirmation”Bookings need your confirmation is on in Online booking. Open the booking and confirm it.
How do I delete my test booking?
Section titled “How do I delete my test booking?”Open it and cancel it. Cancelled bookings are hidden from the calendar unless you switch on Show canceled in the sidebar.